Photographic reflectors are among the most essential tools any photographer needs. The reflector comes in many sizes, shapes, and colors. For beginners, it may be hard to see what’s so great about this reflector. To enlighten you, let’s examine these six tips for using photographic reflectors in your next shoot.
How To Use Photographic Reflectors Correctly
1. Choose the Right Photographic Reflectors
There are so many different shapes and sizes of reflectors that you can choose from. There are rectangular, round, and even triangular reflectors, each with various sizes and colors. Of course, it depends on what kind of photographic reflectors you will take. Will it be portrait photography? Or just simple studio photography?
Many reflectors come in a 42” size. With this size, the reflector is easy to use and reflects the light just perfectly. You can choose from the silver, gold, white, black, or a combination of white and silver reflectors for photography. For versatility, choose a collapsible reflector. You can easily change the surface of the reflector to suit your needs.
Then there are diffusers. The diffuser is a multi-surface reflector that is typically based around a translucent diffuser panel. It is excellent for softening direct light, even though there are 5-in-1 reflectors. A valuable reflector kit, which made it easier to take anywhere. Some photography reflectors are also detachable, enabling you to change the screen to any color or dark shadows of your choice.
2. Using The Photography Reflectors on an Outdoor Shoot
When shooting outdoors, you just cannot always expect good weather. Sometimes, the sky is clear, but there is not enough light. It is where you can use photographic reflectors as a fill light. You can use a reflector to reflect a soft glow and make an even softer light.
Alternatively, if you find yourself working with too much natural light, you can use a reflector to diffuse the light. Put your reflector between your subject and the sun to create a balance and flat lighting.
Reflectors are also great for photographers who want to capture backlit photos that create this beautiful rim light or halo effect, but still draw attention to the front side of the subject. Put the reflectors right in front of the subject. You can play around with the angle to find the perfect one for your photos.
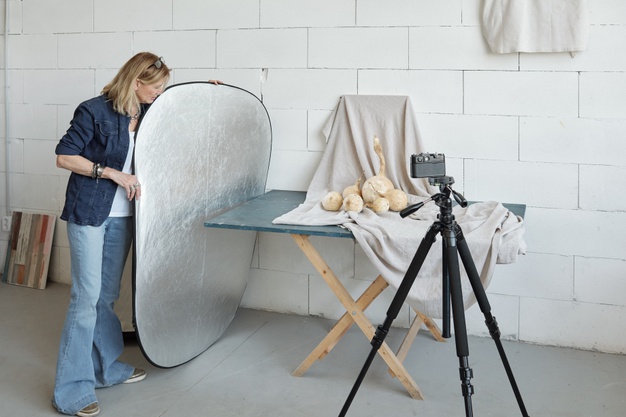
3. Using the Reflector on an Indoor shoot
Don’t think that reflectors are only helpful for outdoor shoots. In a studio environment, even with big lamps and glares, you can still find a reflector to be useful as your key light. Using side reflectors as key light is even normal in many indoor shoots.
Why use a reflector on an indoor shoot? It is because you may see plenty of harsh shadows in indoor shoots. That’s why many beauty shots and product photography done inside a studio heavily rely on reflectors. For example, you want to soften the Shadow around the neck. Just position the reflector underneath it or on the lap of the model.
4. Using the Reflector to Adjust Shadow
Regarding the previous point, photography reflectors can be used to soften shadows. However, it functions far more than just that. Inside a studio with a heavy lighting set, it’s a common problem that the photos turn out looking flat. Here’s how you can make the images look more dynamic: use black reflectors! You can position the black reflector on one side to create a smoldering effect.
5. Using the Reflector as the Light Source
Perhaps you have limited resources or a difficult location to shoot photos at, where it’s hard for you to bring all the lighting equipment that you need. Now, you don’t have to worry because you can get a speed light and a photographic reflector.
Together with the reflector, the speed-light can be used to create a soft light source. Flash your speed-flash and let your reflector reflect light to hit the subject nicely.
Read also: Life Hack: Natural light to represent the image naturally.
6. Using the Reflector to Block Light
A reflector is not used to reflect light only; it can be used to block unwanted light. Ensure you use the black reflector, as it is the most effective in stopping and absorbing light.
But why do you need to block available light? Well, sometimes too much light, especially bouncing light, is unwanted.
A bright day with blue sky is always welcomed, until you see much reflected light coming from every tall building you can find. It is where a reflector can be handy: it can bring you all the light you need for your photos, and it can block the reflected light you do not need. Whether it is natural or artificial light, reflectors can help you block all of them.
In the studio, you can also utilize a black reflector to create dramatic shadows, which can give your image an extra edge when needed. Place the black reflector and aim it towards the area you want to cast a shadow on.
Try to Use Photographic Reflectors for Your Photo Shoots
Those are some tips on how to use photographic reflectors. Blocking and reflecting light is a necessary skill if you want to master your photography. It can be hard at first. However, practice often, and you will find yourself naturally manipulating lights around your subject.
Suppose you need help with professional photo retouching services. In that case, you can trust Dropicts, which will enhance your product photos or promotional photos for your business.

Image Source: