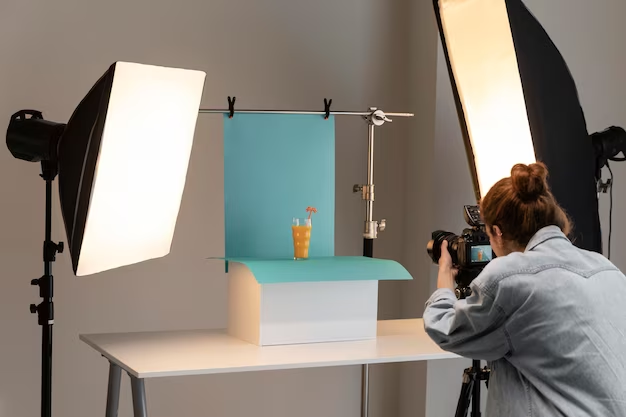
The importance of product photos cannot be emphasized in the fast-paced world of e-commerce and digital marketing. Product photos act as your brand’s most compelling sales agents in an age where a single click may be the difference between a sale and a wasted opportunity. While having high-quality photographs is a good place to start, understanding the art of product image editing is the key to generating visually stunning graphics that stand out in a competitive marketplace.
This article will guide you through the process of transforming raw, unfiltered photographs into spectacular, attention-grabbing graphics that not only fascinate but also drive purchases. By the time you finish reading, you’ll have a deeper understanding of the importance of image editing and the skills needed to make your product images truly remarkable.
The Power of Product Image Editing
Before delving into the complexities of mastering product picture editing, it’s essential to understand why this process is crucial for businesses today. Product photos are your potential consumers’ initial point of contact with your offers. The quality of your product photos says volumes about your brand’s reputation and the quality of your items in the digital arena, where physical scrutiny is difficult.
Effective picture editing has numerous significant advantages:
1. Attractiveness
Image editing helps you to fix lighting problems, increase color accuracy, and boost overall visual appeal. You may make your items appear even more appealing by using the correct editing techniques.
2. Reliability
Building a strong and recognizable brand requires consistency in visual design and quality. You may improve your brand’s identity by maintaining a consistent look across your product catalog through rigorous editing.
3. Emphasising Details
Specific product characteristics and nuances must be highlighted for your buyers to comprehend their worth completely. Image editing can help you bring attention to these essential features.
4. Shortening Load Times
Image optimization for the web not only enhances user experience but also has a favorable influence on your website’s loading speeds. It is well known that faster loading times minimize bounce rates and boost search engine results.
5. Increasing Conversions
Finally, well-edited photographs have a higher chance of converting visitors into paying clients. The more enticing your product photographs, the more likely you are to drive purchases.
The Path from Raw to Remarkable
Step 1: Shooting in RAW
The first step in creating remarkable product images is capturing them in RAW format. Unlike JPEG images, RAW files contain all the data collected by the camera’s sensor, allowing for maximum flexibility during the editing process. This format preserves the image’s original quality.
Step 2: Sorting and Organizing
An often overlooked yet crucial step is to organize and sort your images effectively. Create a structured file system and sort your pictures into folders based on products, shoots, or categories. Proper organization sets the stage for a smooth editing process.
Step 3: Image Selection
Not every image you capture will be perfect. Take the time to select the best shots that meet your quality and aesthetic standards. Quality should always take precedence over quantity.
Step 4: Basic Adjustments
With your selected images, make basic adjustments. These might include:
– Exposure: Correct underexposed or overexposed areas.
– White Balance: Ensure accurate color representation.
– Contrast: Adjust the contrast for a more dynamic look.
– Crop and Straighten: Fine-tune composition.
Step 5: Advanced Editing
This is where the magic happens. Advanced editing involves more complex techniques and may include:
1. Retouching
Removing imperfections or unwanted elements is a key aspect of advanced editing. Dust, scratches, or blemishes can be skillfully retouched using tools like the Healing Brush or Clone Stamp.
2. Color Correction
Accurate color representation is vital. Advanced editing includes color correction, ensuring the product’s colors accurately represent reality. You can use adjustment layers and tools, such as Color Balance or Hue/Saturation, for this purpose.
3. Background Removal
For e-commerce product images, background removal is often necessary. You can use precise selection tools like the Pen Tool or Magic Wand to create transparent or replacement backgrounds.
4. Shadows and Highlights
Adding or enhancing shadows and highlights can make your product stand out. This is achieved through techniques like dodging and burning, which allow you to control shadow and highlight detail.
5. Sharpness and Clarity
You can enhance the sharpness and clarity of your product images to highlight fine details. This can be achieved using tools like the Unsharp Mask or Smart Sharpen.
6. Texture Enhancement
To make products more appealing, enhance their texture. Techniques like frequency separation can help you control and improve the texture in your images.
Step 6: Product-Specific Adjustments
Different products may require specific adjustments. For example:
– Jewelry: Focus on reflections, gemstone clarity, and metal shine.
– Clothing: Pay attention to fabric texture, color vibrancy, and wrinkle removal.
– Electronics: Highlight screen details and ensure the product looks sleek and modern.
Step 7: Sizing and Formatting
After completing the editing process, you’ll need to optimize the image size and format according to its intended use. For web usage, JPEG is the standard format, but please be aware of the quality and compression settings.
Step 8: Testing and Feedback
Before finalizing your images, please look for feedback from colleagues or potential customers. Testing different photos can provide valuable insights into what resonates most with your target audience.
Step 9: Consistency
Consistency is key to a strong brand identity. Create presets or actions in your editing software to ensure uniformity across all your product images.
Choosing the Right Editing Tools
You’ll need the correct tools to perfect the art of product picture editing. Adobe Photoshop and Adobe Lightroom are image editing industry standards. GIMP (GNU Image Manipulation Programme) and Capture One are two good choices. You can choose the one that best meets your needs and preferences.
Mastering the art of product picture editing takes time, effort, and a keen eye for detail. The process of transforming raw, unfiltered photographs into spectacular, appealing graphics has a significant influence on your business. It’s not just about enticing people; it’s also about increasing revenue and improving the reputation of your company.
Image editing is an art as well as a science. It combines technical abilities, creativity, and knowledge of your target audience. By following the procedures indicated in this tutorial and constantly improving your talents, you can transform your product photographs from ordinary to extraordinary, making a lasting impact on your clients and propelling your company to new heights.
FAQs
1. Do I need to shoot all my product images in RAW format?
• While shooting in RAW format provides maximum flexibility during editing, it’s not always necessary. If your images are well-exposed and require minimal adjustments, shooting in JPEG can be acceptable. However, for critical product shots, especially those with challenging lighting conditions, shooting in RAW is recommended.
2. How can I ensure consistency in image editing across my entire product catalog?
• Consistency is vital for brand identity. To ensure uniformity, create presets or actions in your editing software that apply the same adjustments to all your images. This can save time and help maintain a consistent look.
3. What software is best for image editing?
• Adobe Photoshop and Adobe Lightroom are the industry standards for image editing. They offer a wide range of tools and functionalities. However, if you’re looking for free alternatives, GIMP and Darktable are excellent options. The choice depends on your specific needs and budget.
4. How can I optimize image size and format for web use?
• To optimize images for the web, you can use image compression tools and export settings in your editing software. JPEG is the standard format for web use, but be mindful of the compression level to balance image quality and file size.
5. Are there any best practices for testing product images before finalizing them?
• Yes, it’s a good practice to seek feedback from colleagues, friends, or potential customers. A/B testing, where you present different versions of an image to test groups, can help determine which visuals resonate best with your target audience.
If you’re short on time to fix your photos, no worries! Contact us now to get free image editing services. Click here to contact our sales representative!
Image Source: