
Learning how to use Puppet Warp in Photoshop might feel intimidating at first. Still, once you understand the logic behind pins and movement, it quickly becomes one of the most fun and powerful tools in Photoshop. If you’ve ever wanted to fix awkward poses, adjust arm positions, or subtly change body posture without damaging the image, Puppet Warp is precisely what you need.
This guide is written for beginners and creatives who want practical, real-world editing skills without technical jargon. Let’s break everything down step by step.
Is There a Warp Tool in Photoshop?
Yes, there is a warp tool in Photoshop, and actually, there are several.
Photoshop includes different warp options, such as:
- Transform Warp
- Liquify
- Puppet Warp
Each one serves a different purpose. Standard Warp is great for reshaping objects, Liquify is ideal for organic adjustments like faces and bodies, and Puppet Warp is designed for controlled movement using anchor points.
If your goal is to move limbs, adjust posture, or tweak specific parts of an image, learning how to use Puppet Warp in Photoshop is the most precise option.
What Is Puppet Warp in Photoshop?
Puppet Warp allows you to place “pins” on an image and move those pins to reshape the subject naturally. Think of it like adding joints to a puppet and pulling them gently into a new position.
It’s commonly used for:
- Adjusting body poses
- Fixing bent arms or legs
- Enhancing fashion photos
- Creative photo manipulation
Unlike regular warp, Puppet Warp gives you more control over specific points, not the whole image.
How to Activate Puppet Warp in Photoshop
Before you can use it, you need to activate Puppet Warp correctly. Here’s how:
Step-by-step activation

1. Open your image in Photoshop
2. Select the layer you want to edit.

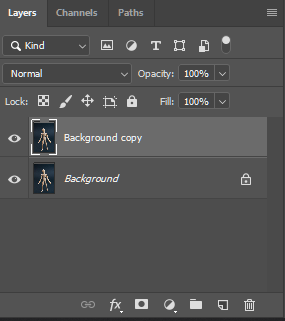
3. Convert the layer to a Smart Object (recommended)
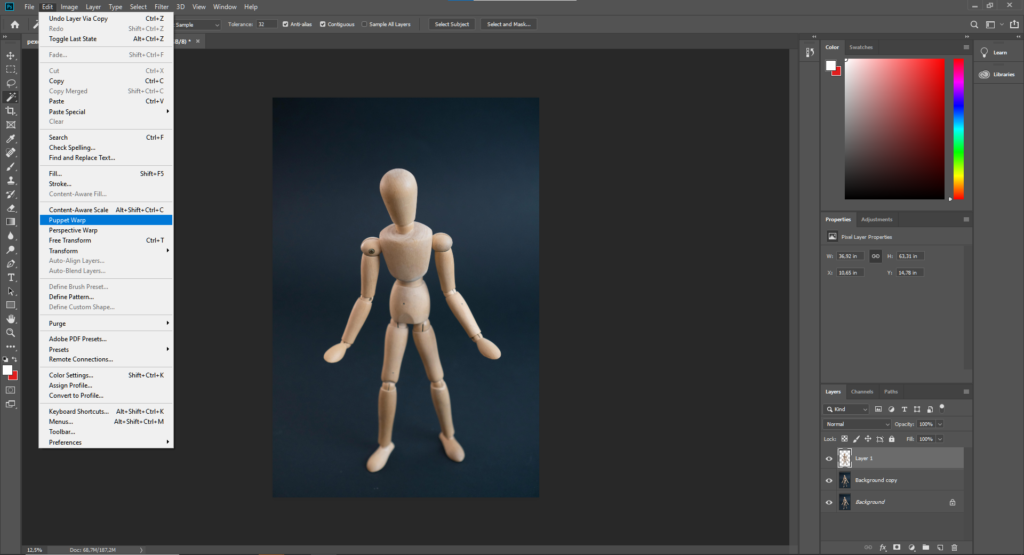
4. Go to Edit > Puppet Warp
Once activated, you’ll see a mesh overlay on your image. This mesh enables Photoshop to calculate natural movement.
How to Use Warp in Photoshop (Basic Overview)
If you’re new, it helps to understand how warp works in general.
Basic warp workflow
- Select an object or layer
- Choose a warp tool
- Adjust points or curves
- Apply changes carefully
When people ask how to use warp in Photoshop, they’re often referring to Transform Warp. But Puppet Warp is more advanced because it works with pins and joints rather than grids.
How to Use Puppet Warp in Photoshop: Step-by-Step
Now let’s get into the central part: how to use Puppet Warp in Photoshop properly.
Step 1: Prepare Your Image
- Use a clean, high-resolution photo
- Isolate your subject if needed
- Convert the layer to a Smart Object
It makes your edits non-destructive and safer.
Step 2: Enable Puppet Warp
Go to Edit > Puppet Warp.
You’ll see an automatic mesh covering the subject.
Step 3: Place Pins Strategically
Click on key areas:
- Joints (elbows, knees, shoulders)
- Fixed areas you don’t want to move
- Areas you want to reposition
Pins act as anchors. The more control you want, the more pins you’ll need, but don’t overdo it.
Step 4: Move Pins Gently
Click and drag a pin slightly to adjust position.
Small movements look more realistic than extreme bends.
It is where Puppet Warp shines compared to regular warp tools.
Step 5: Adjust Mesh Settings (Optional)
In the top bar, you can change:
- Mode (Rigid, Normal, Distort)
- Density (More points = more control)
For beginners, “Normal” mode works best.
Step 6: Apply the Warp
Press Enter when you’re satisfied.
Zoom out and check the realism of your edit.
Common Puppet Warp Mistakes to Avoid
Even when you know how to use Puppet Warp in Photoshop, mistakes can still happen.
Avoid these:
- Moving pins too far at once
- Using too few anchor pins
- Ignoring body anatomy
- Warping low-resolution images
Subtlety is the key to professional-looking results.
Pro Tips to Get Natural Results
Want your edits to look believable? Try these tips:
- Always anchor the torso before moving limbs
- Combine Puppet Warp with Liquify for refinements
- Zoom in and out frequently
- Compare the before and after versions
These habits make a huge difference in final quality.
When Should You Use Puppet Warp?
Puppet Warp is perfect when:
- A pose feels awkward but almost right
- Clothing looks stiff
- Limbs need minor corrections
- You want creative motion effects
However, if you need central body reshaping, Liquify might be a better option.
Final Thoughts
Learning how to use Puppet Warp in Photoshop opens up a whole new level of creative control. It’s one of those tools that seems intimidating at first, but once you understand pins, anchors, and subtle movement, it becomes incredibly intuitive.
If you’re serious about photo editing, mastering Puppet Warp will save you time, improve realism, and help you create edits that genuinely stand out.
Start slow, practice often, and don’t be afraid to experiment; that’s where the best results come from.
If you’re short on time to fix your photos, no worries! Contact us now to get free image editing services. Click here to contact our sales representative!
Quick FAQ About How to Use Puppet Warp in Photoshop
Can beginners use Puppet Warp in Photoshop?
Yes. Puppet Warp is beginner-friendly as long as you start with small movements and use enough anchor pins to control distortion.
Is Puppet Warp better than Liquify?
Puppet Warp is better for adjusting limbs and posture, while Liquify works better for reshaping faces or body proportions.
Does Puppet Warp damage image quality?
Not if you use Smart Objects. This keeps edits non-destructive and maintains image quality.
Image Source: