
The Liquify Tool in Photoshop is one of the most powerful and enjoyable features for anyone who wants to elevate their image editing skills. It allows you to reshape and manipulate parts of an image as if you’re molding digital clay — without destroying the overall quality. From fashion retouching to surreal art, the Liquify Tool is a favorite among photographers, designers, and digital artists alike.
What makes this tool so popular is its versatility. You can subtly adjust facial features for portraits, reshape clothing or hair to enhance flow, or go all-in and create a liquid-melt effect for bold artistic edits. The best part? It’s all non-destructive — meaning you can tweak as much as you like and still retain your original image.
Whether you’re fixing minor imperfections or transforming entire compositions, mastering the Liquify Tool in Photoshop opens up endless creative possibilities. And the interface is user-friendly enough that even beginners can get impressive results quickly.
In this guide, we’ll cover:
- Where to find the Liquify Tool
- How to use it for liquid effects
- Pro tips for beginners
Let’s dive in!
Where Is the Liquify Tool in Photoshop?
You can find the Liquify Tool in just a few clicks:

Source: pexels.com
1. Open Photoshop and load your image.

2. Go to Filter in the top menu.
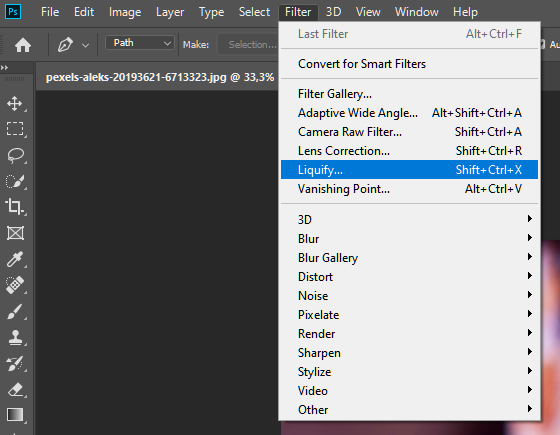
3. Select Liquify (Shortcut: Shift + Ctrl + X on Windows or Shift + Command + X on Mac).
This will open the Liquify workspace, where you can start editing.
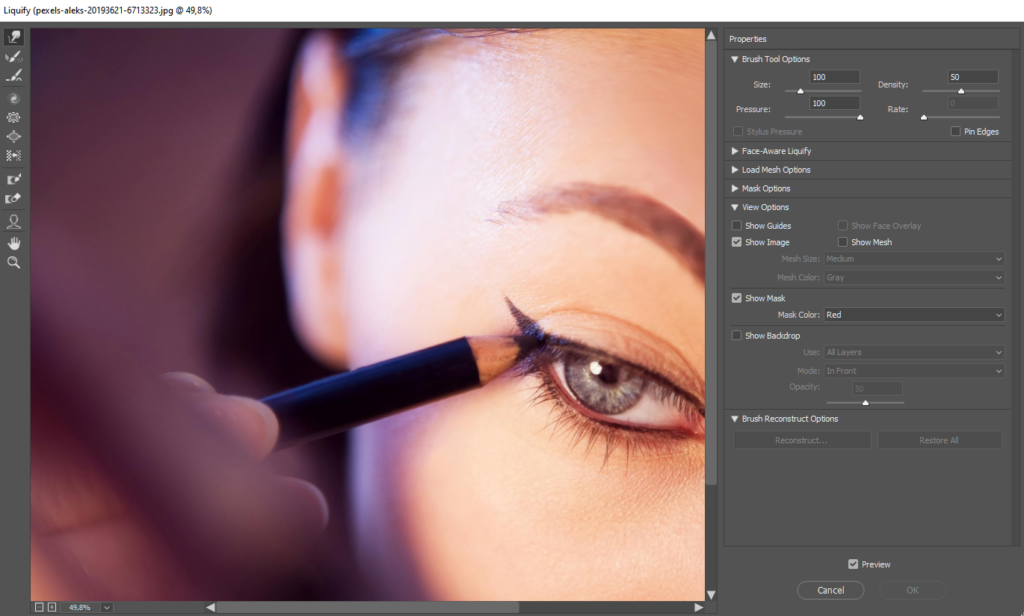
How to Use the Liquify Tool in Photoshop
Once you’re inside the Liquify workspace, here’s how you can use the different tools:
1. Forward Warp Tool – Push and reshape pixels
- Click and drag to move parts of your image in any direction.
- Useful for reshaping objects and faces or creating flowy effects.
2. Reconstruct Tool – Undo adjustments
This tool restores the image to its original state if you’ve made changes you don’t like.
3. Twirl Clockwise Tool – Create a spinning effect
Click and hold to rotate sections of your image in a circular motion. It’s great for creating swirling, abstract designs.
4. Pucker & Bloat Tools – Shrink or enlarge areas
- Pucker Tool: Pulls pixels inward, making an area smaller.
- Bloat Tool: Expands pixels outward, making an area appear larger.
- Often used in photo retouching or to create cartoon-like effects.
5. Face-Aware Liquify – Automatically adjust facial features
- If Photoshop detects a face, this feature lets you edit eyes, nose, lips, and jawline with simple sliders.
- Perfect for subtle retouching without distorting the image.
How to Create a Liquid Effect in Photoshop
Want to make a melting, fluid-like effect? Here’s how:
- Duplicate your image layer (so you have a backup).
- Open Liquify (Shift + Ctrl + X / Shift + Command + X).
- Select the Forward Warp Tool and drag parts of the image outward to create a stretched fluid motion.
- Use the Twirl Clockwise Tool to add smooth, swirling movements.
- Adjust Brush Size & Density to control how strong the effect is.
- Click OK when you’re happy with the result.
You can combine this with layer masks or blending modes for added depth for a more dramatic liquid look.
Pro Tips for Using Liquify in Photoshop
- Use a soft brush for natural-looking edits.
- Zoom in and out to check the details.
- Work on a duplicate layer so you can always go back if needed.
- Adjust brush pressure to control how strong the liquifying effect appears.
Final Thoughts
The Liquify Tool in Photoshop is perfect for retouching, artistic edits, and fun distortions. Whether you’re using it to enhance a portrait subtly or create dramatic liquid effects, this tool gives you the freedom to experiment.
If you’re short on time to fix your photos, no worries! Contact us now to get free image editing services. Click here to contact our sales representative!