
If you’ve ever taken a photo and thought, “I wish there were more space around the subject,” you’re not alone. Knowing how to extend background in Photoshop is one of the most useful skills you can learn, whether you’re editing for Instagram, client work, or just personal projects.
The good news? You don’t need to be a Photoshop expert to do it. With a few simple tools and techniques, you can realistically expand any background in minutes.
Let’s break it down step by step.
What Does Extending Background Mean?
Before jumping into tools and steps, let’s quickly clear this up.
Extending a background means adding more space around your image while keeping it natural-looking. For example:
- Expanding the sky in a landscape photo
- Adding more wall space behind a subject
- Fixing tight cropping
Instead of stretching the image (which looks bad), Photoshop helps you generate or clone realistic extra areas.
Tools Used to Extend the Background
To master how to extend background in Photoshop, you need to know the main tools. Each one works best in different situations.
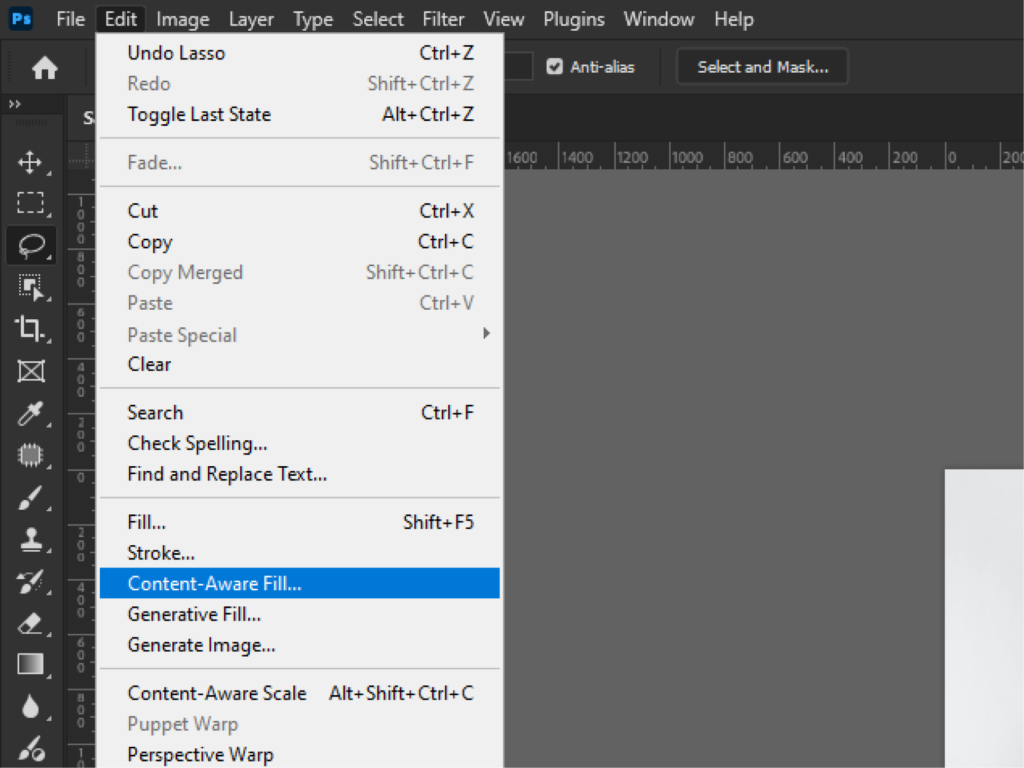
1. Content-Aware Fill
It is the most powerful and beginner-friendly tool.
- Automatically fills empty areas.
- Uses surrounding pixels as reference
- Great for skies, grass, textures
Best for: Quick and natural-looking results
2. Clone Stamp Tool
This tool lets you manually copy parts of an image.
- You choose the source area.
- Paint over the space
- Full control over details
Best for: Precise editing
3. Healing Brush Tool
Similar to Clone Stamp, but smarter.
- Blends texture automatically
- Matches lighting and color
Best for: Smooth blending
4. Crop Tool (Content-Aware Mode)
Many beginners don’t realize this exists.
- Expand canvas using Crop Tool
- Enable “Content-Aware”
- Photoshop fills the new space automatically
Best for: Fast background extension
5. Generative Fill (AI Tool)
If you’re using newer Photoshop versions:
- Select an empty area
- Click “Generative Fill”
- AI creates a realistic background
Best for: Complex scenes
How Do I Extend Part of a Background in Photoshop?
Now let’s get practical. Here’s a simple step-by-step method anyone can follow.
Method: Using Content-Aware Fill (Recommended)
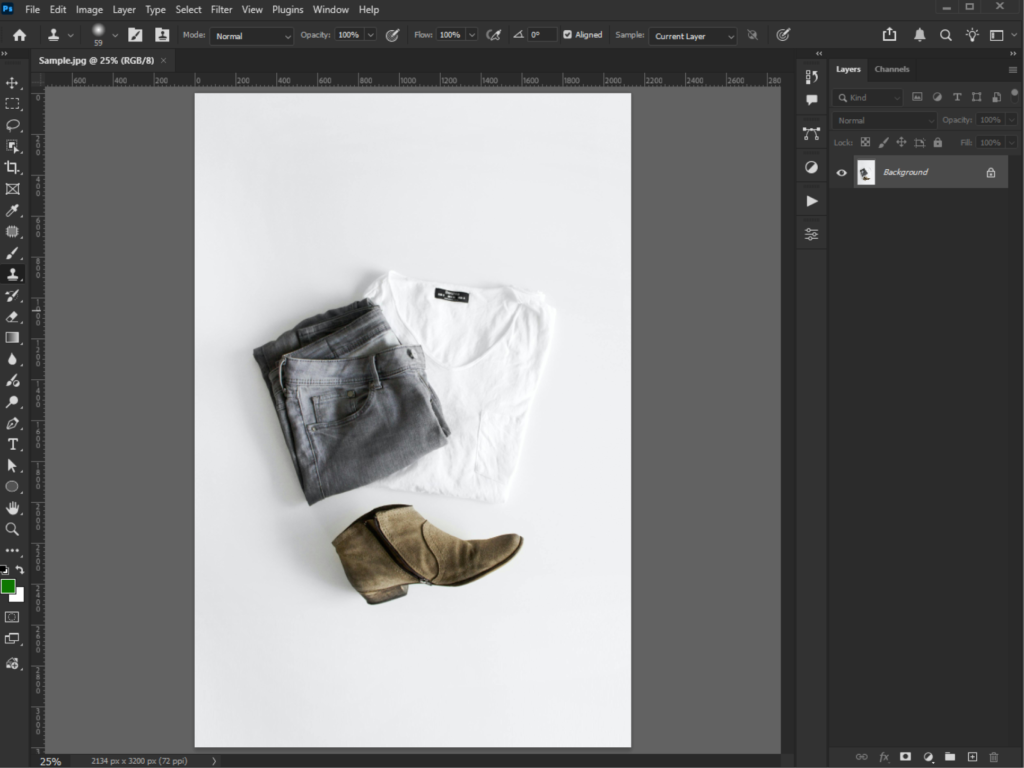
Step 1: Open Your Image
Launch Photoshop and load your image.
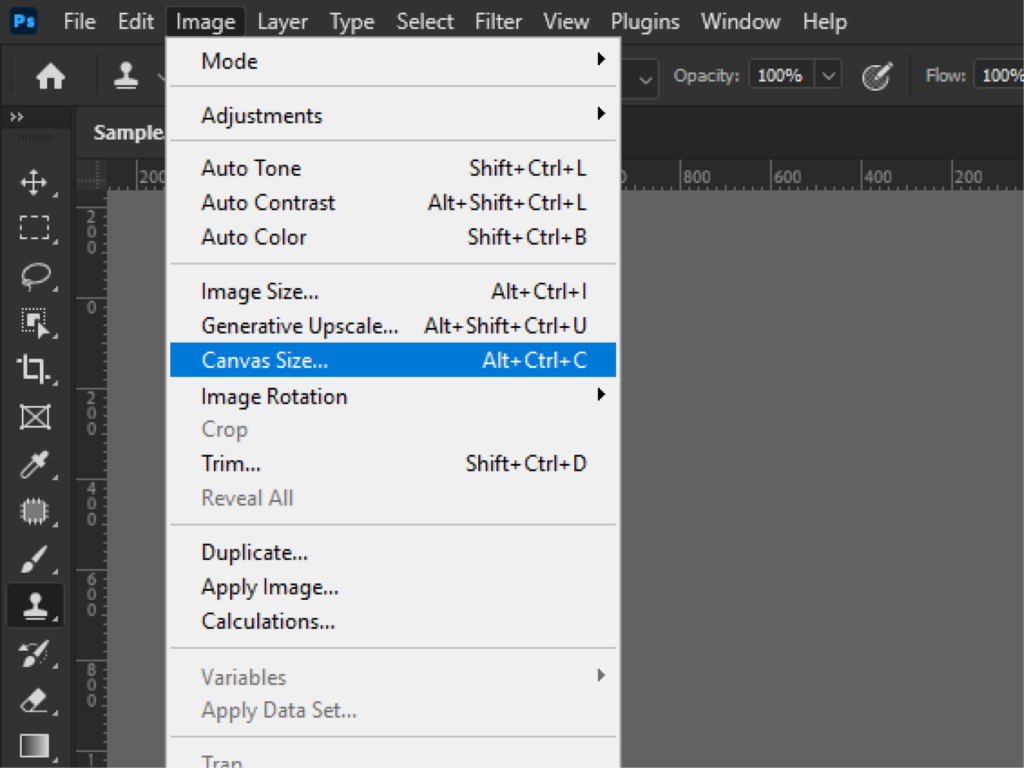
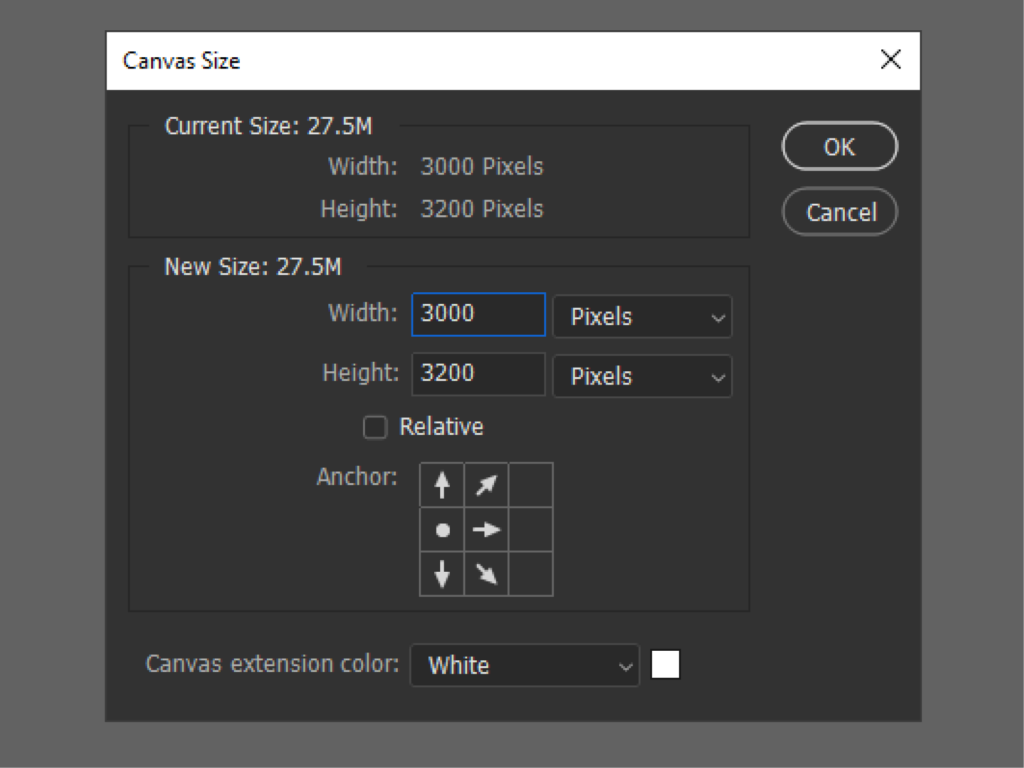
Step 2: Extend the Canvas
- Go to Image → Canvas Size
- Increase width or height
- Choose where you want extra space
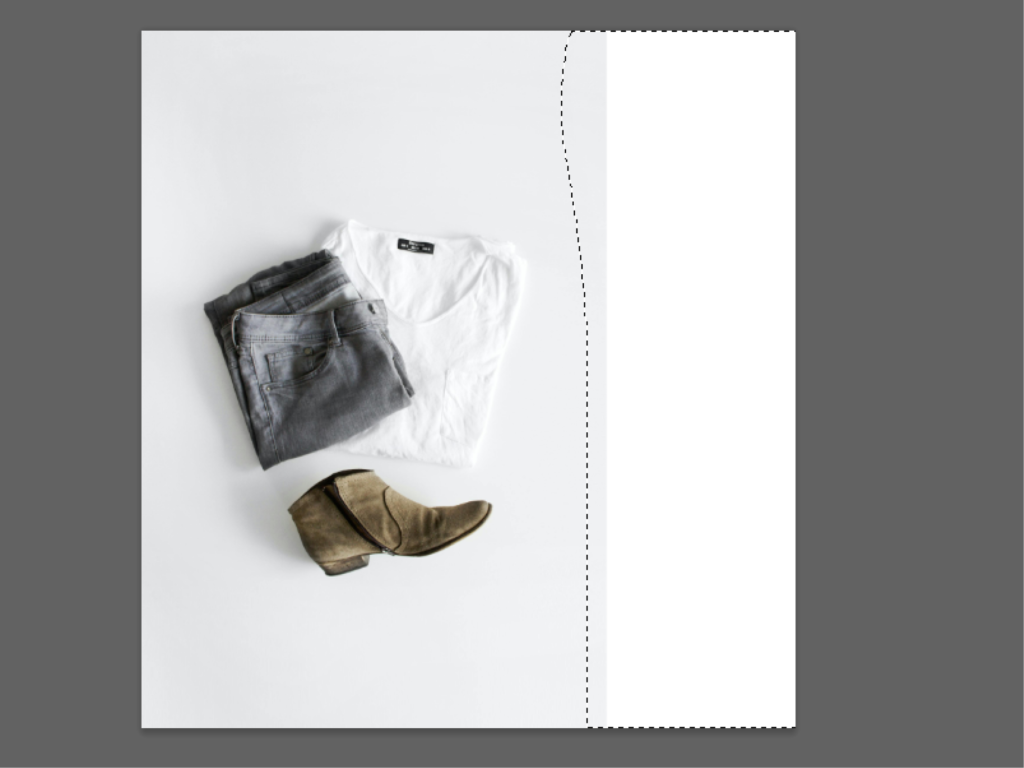
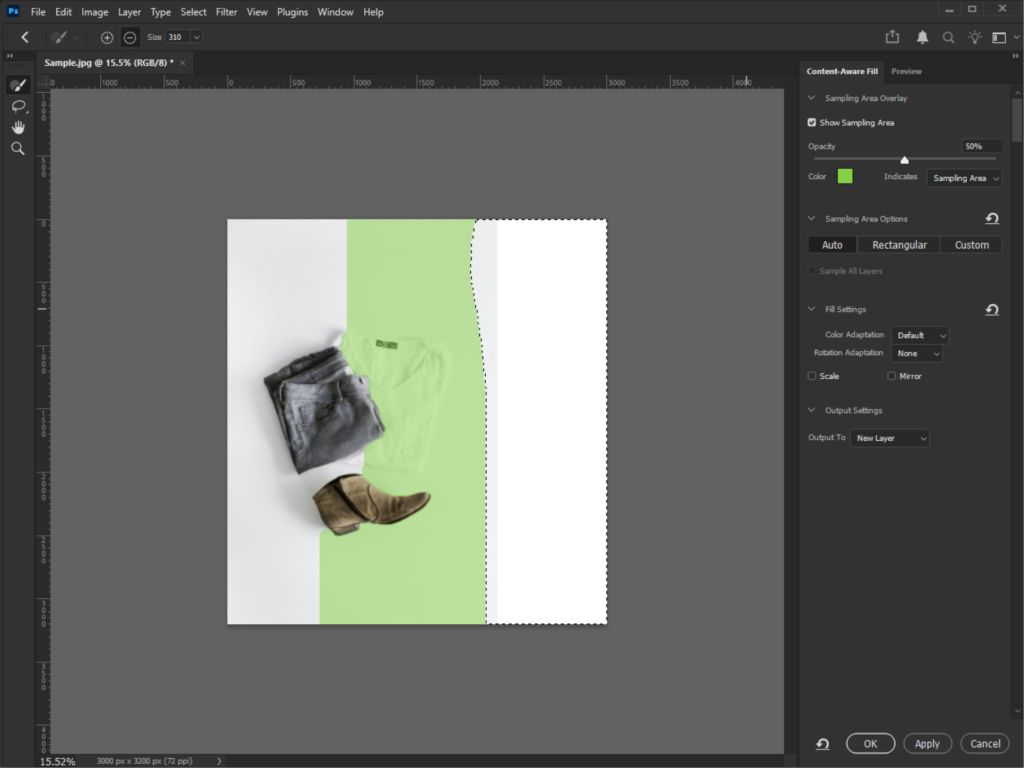
Step 3: Select the Empty Area
Use the Lasso Tool (L) to highlight the blank space.
Step 4: Apply Content-Aware Fill
- Go to Edit → Content-Aware Fill
- Adjust sampling area if needed
- Click OK
Photoshop will automatically fill the space.
Alternative: Using Crop Tool (Fastest Way)
- Select the Crop Tool (C)
- Drag outward to expand your image
- Check Content-Aware in the top bar
- Press Enter
Done. Photoshop fills the background instantly.
Manual Method: Clone Stamp
If auto tools fail:
- Select Clone Stamp Tool (S)
- Hold Alt/Option to sample area
- Paint over the space
- Blend edges carefully
It takes more time, but gives you full control.
Here’s the Results:

 After
After
Key Techniques to Extend Backgrounds
Knowing the tools is one thing. Using them well is another.
Here are some key techniques that will make your edits look clean and natural.
1. Work with Simple Backgrounds First
Flat areas like:
- Sky
- Walls
- Water
They are much easier to extend than complex scenes.
2. Use Small Selections
Instead of filling a huge area at once:
- Work in sections
- Fill gradually
It gives better results and fewer glitches.
3. Pay Attention to Patterns
Repeating textures (like bricks or tiles) can look fake.
How to Fix it:
- Use Clone Stamp to break repetition
- Mix different areas
4. Blend Edges Carefully
Hard edges = obvious edits.
Use:
- Healing Brush
- Soft Eraser
- Layer masks
To smooth transitions.
5. Combine Multiple Tools
Don’t rely on just one method.
Example workflow:
- Content-Aware Fill → base
- Clone Stamp → fix details
- Healing Brush → blend
6. Zoom In and Check Details
What looks good from far away might break up close.
Always:
- Zoom to 100%
- Check edges and textures
Common Mistakes to Avoid
Even if you understand how to extend background in Photoshop, these mistakes can ruin your result:
- Stretching the image instead of extending
- Using Content-Aware on complex subjects
- Ignoring lighting consistency
- Overusing the same cloned area
- Not blending edges
Fixing these will instantly improve your edits.
Final Tips for Better Results
If you want your edits to look professional, keep these tips in mind:
- Start simple, then move to complex images
- Practice on landscapes first
- Use high-resolution images
- Don’t rush the blending process
- Always compare before vs after
Conclusion
Learning how to extend background in Photoshop is a game-changer, especially if you’re into photography, content creation, or design.
With tools like Content-Aware Fill, Clone Stamp, and Generative Fill, you can easily expand your images without making them look fake.
The key is simple:
- Use the right tool
- Work in small steps
- Focus on blending
Once you get the hang of it, you’ll be able to fix compositions, resize images, and create cleaner visuals in just minutes.
If you’re short on time to fix your photos, no worries! Contact us now to get free image editing services. Click here to contact our sales representative!
Image Source: