How to upscale an image in Photoshop is a skill every designer, photographer, and content creator should know. Whether you’re preparing photos for social media, printing posters, or improving an old image, upscaling lets you increase resolution without making the image look blurry.
The good news? Photoshop already has powerful tools that make this process surprisingly easy, even for beginners.
What Does Upscaling Mean?
Before learning how to upscale an image in Photoshop, it’s important to understand what image upscaling actually means.
Upscaling is the process of increasing an image’s resolution or dimensions, for example, turning a 1000×1000 pixel image into 2000×2000 pixels.
However, simply enlarging an image can cause problems like:
- Blurry details
- Pixelation
- Loss of sharpness
That’s why Photoshop uses advanced resampling methods and AI tools to add new pixels rather than simply stretching the image.
When done correctly, upscaling can dramatically improve the usability of your photos.
How to Upscale Images Without Losing Quality
If you want to improve resolution while maintaining quality, follow this beginner-friendly method.
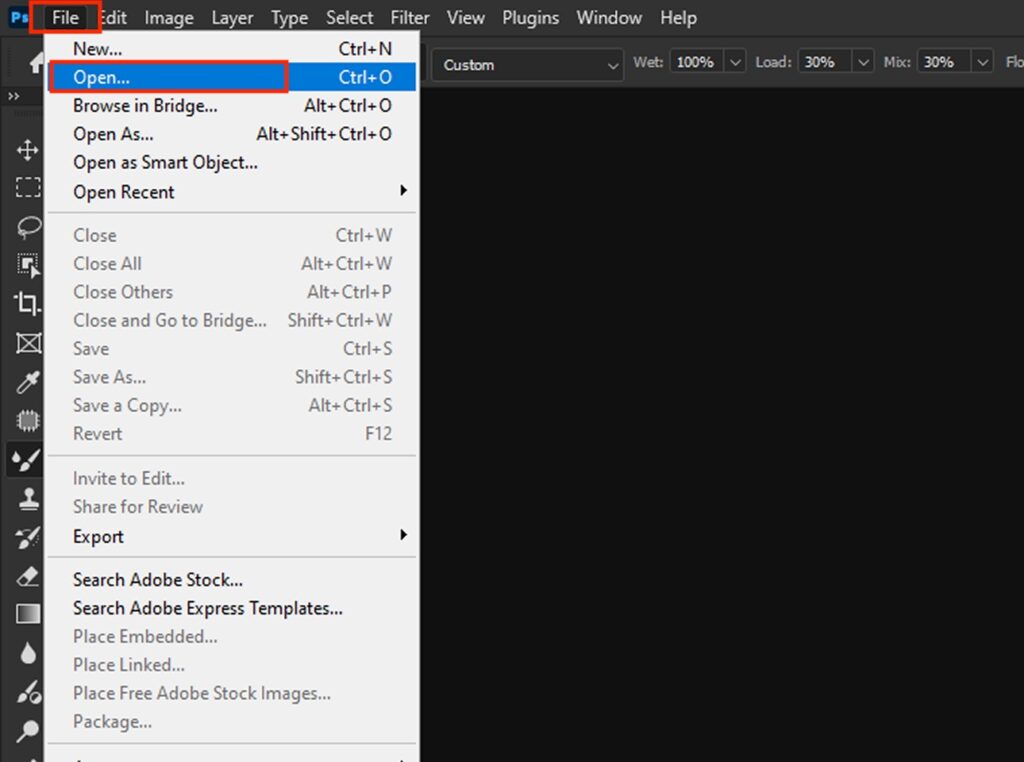
Step 1: Open Your Image
Open Photoshop and go to:
File > Open
Select the image you want to upscale.
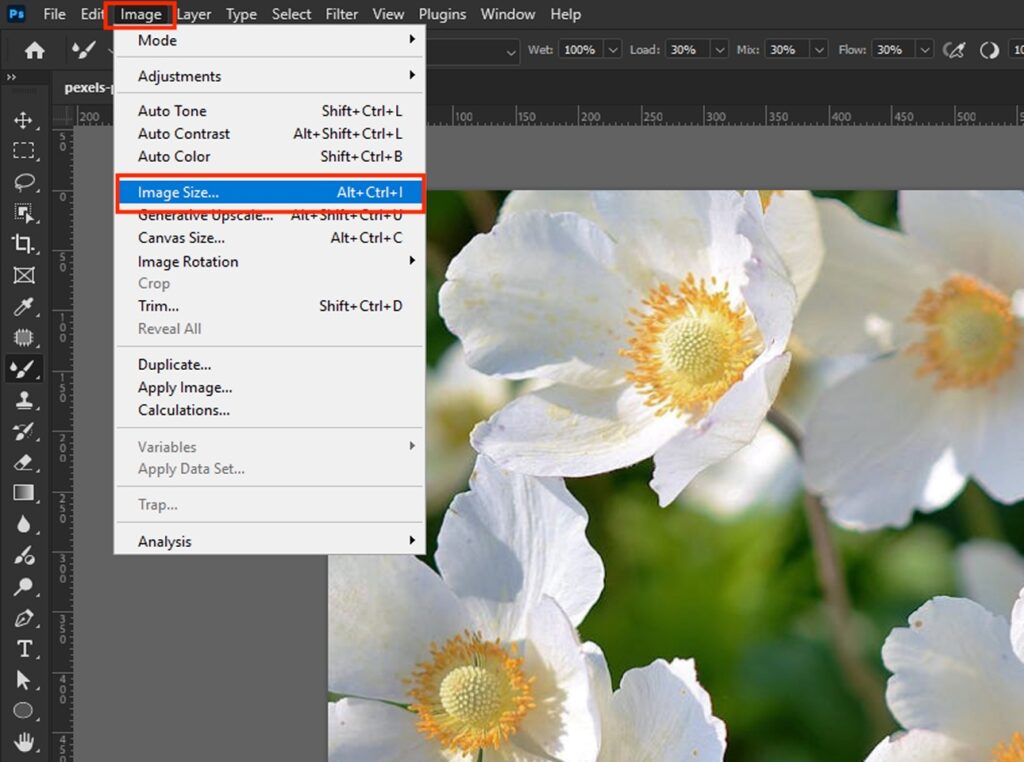
Step 2: Open Image Size Settings
Next, navigate to:
Image > Image Size
A window will appear showing the image dimensions and resolution.
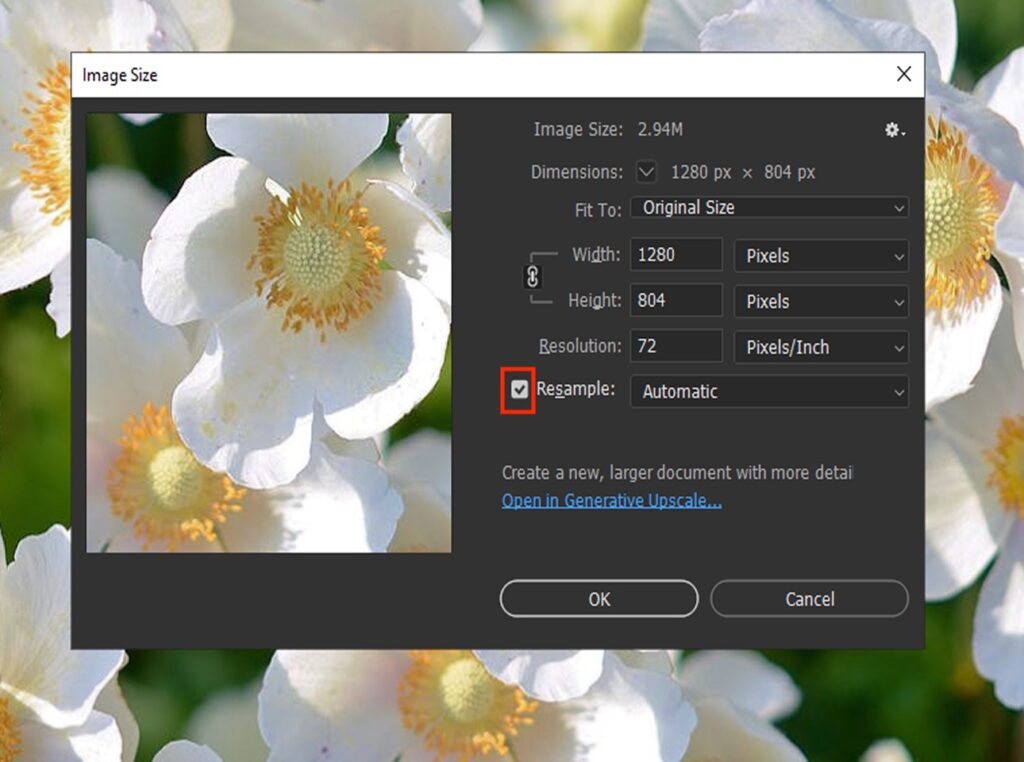
Step 3: Enable Resample
Make sure the Resample option is checked.
It allows Photoshop to create new pixels when enlarging the image.
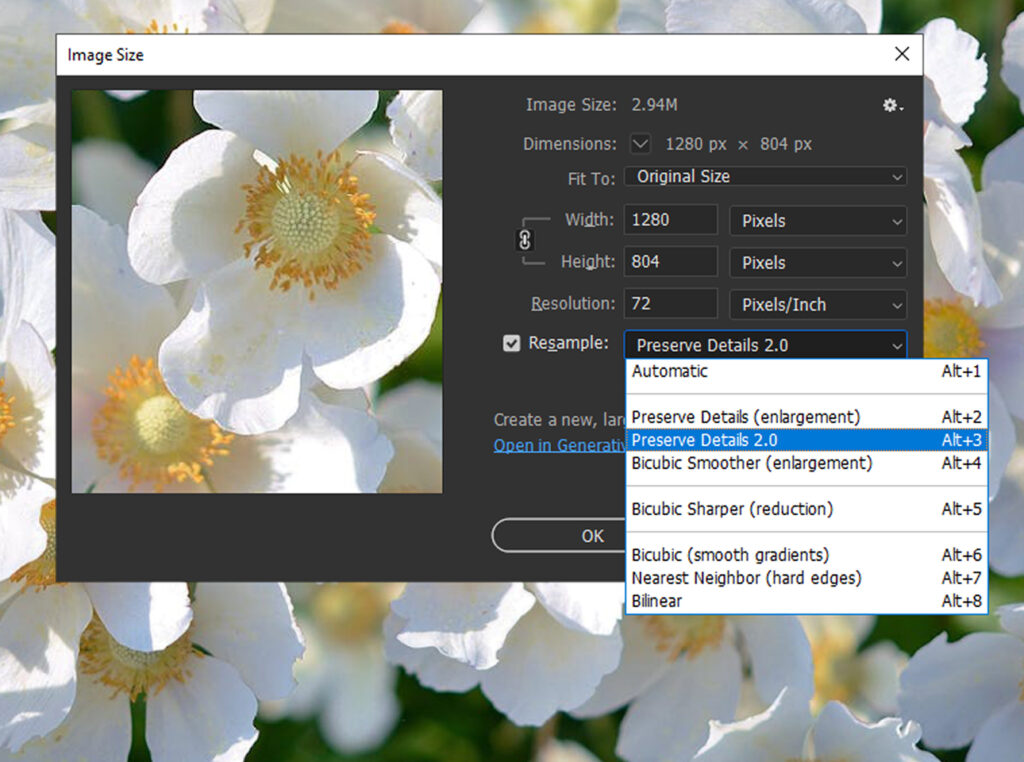
Step 4: Choose the Best Resampling Method
In the resample dropdown menu, select:
Preserve Details 2.0
This AI-based option is one of the best choices when learning how to upscale an image in Photoshop.
It helps maintain sharp edges and reduce noise when enlarging images.
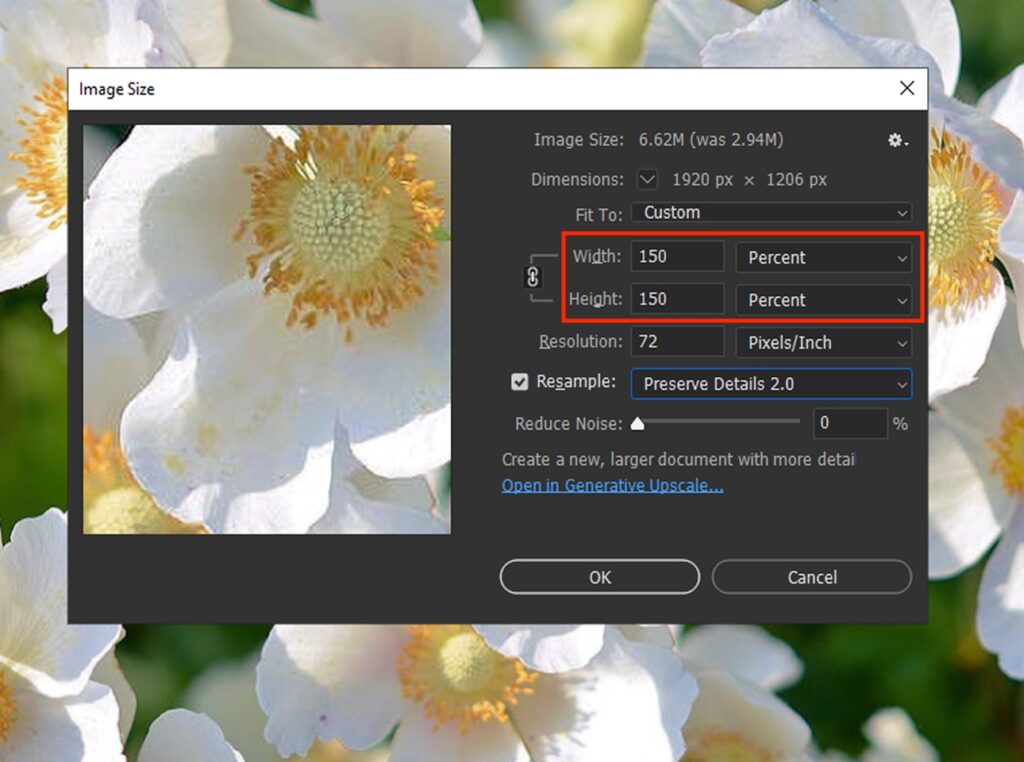
Step 5: Increase Image Size
Now increase the width or height percentage.
For example:
- 150% for moderate enlargement
- 200% for larger images
Avoid going too extreme in one step.

Step 6: Reduce Noise if Necessary
In Preserve Details 2.0, Photoshop lets you adjust Noise Reduction.
Try values around:
- 10–20% for most images
It helps smooth artifacts created during upscaling.
Step 7: Apply Sharpening
After resizing, add slight sharpening.
Go to:

Filter > Sharpen > Smart Sharpen
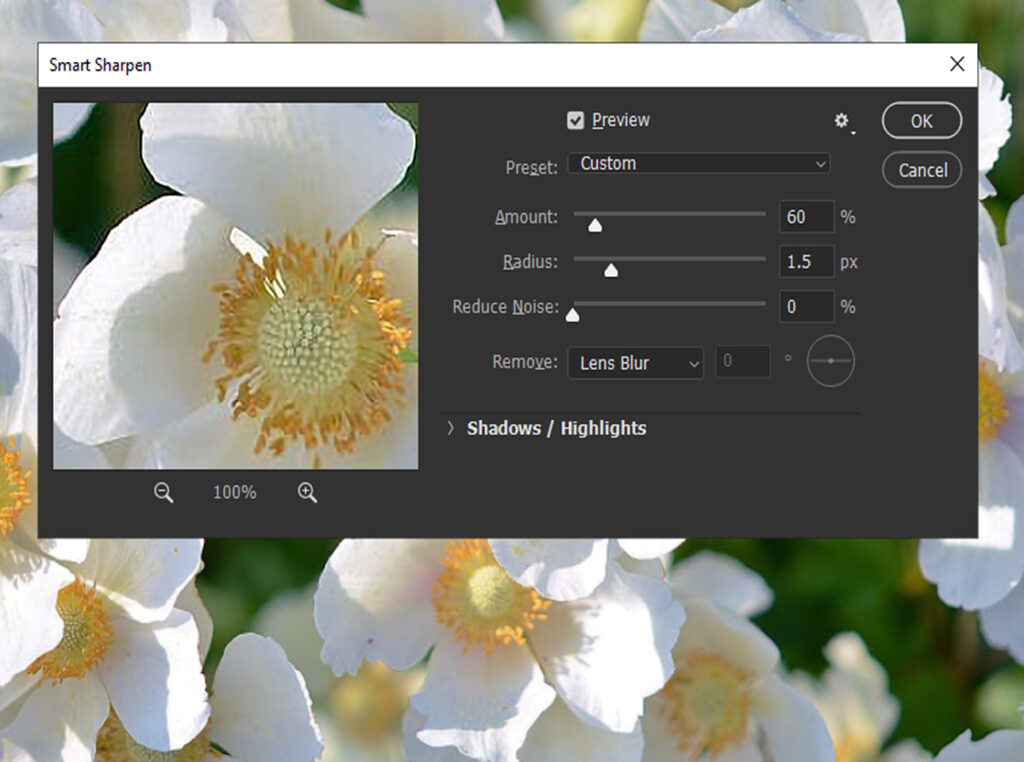
Recommended beginner settings:
- Amount: 40–70%
- Radius: 0.5–1.2 px
This restores detail lost during resizing.
The Results:

Before
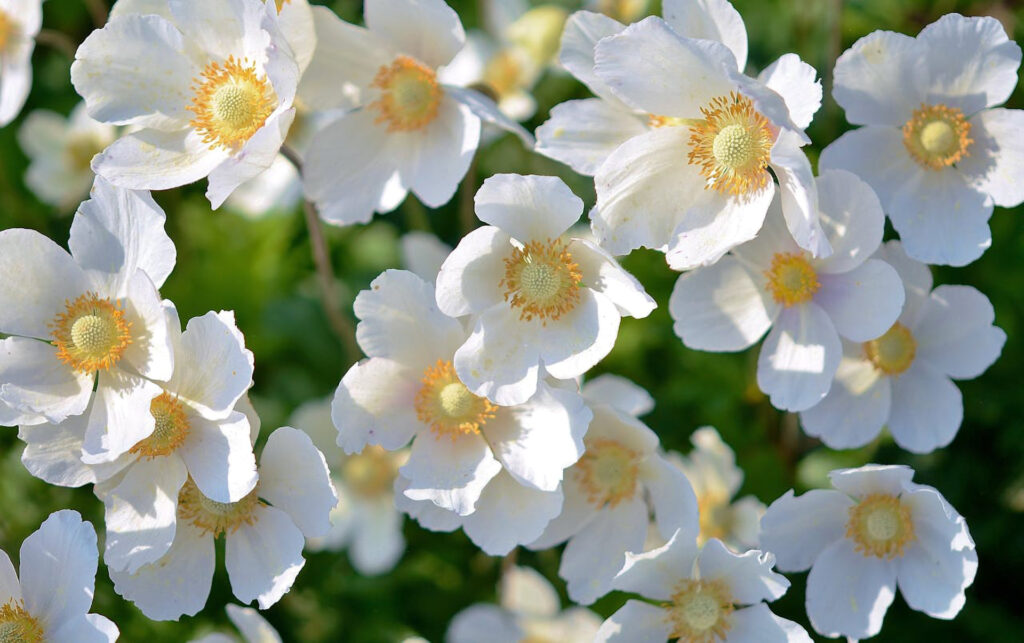
After
How to Properly Upscale an Image in Photoshop
Many beginners upscale images incorrectly. If you want professional results, follow these best practices.
1. Upscale Gradually
Instead of increasing size from 100% to 400%, upscale in stages.
Example workflow:
- 100% → 150%
- 150% → 200%
- 200% → 300%
It helps Photoshop maintain detail.
2. Convert Image to Smart Object
Before resizing, convert the image layer.
Right-click the layer and choose:
Convert to Smart Object
It allows non-destructive editing and preserves image quality.
3. Use Camera Raw for Extra Detail
Another advanced trick for learning how to upscale an image in Photoshop is to use the Camera Raw Filter.
Go to:
Filter > Camera Raw Filter
Adjust:
- Texture: +10 to +20
- Clarity: +5 to +15
- Sharpening: +20
These subtle enhancements improve perceived resolution.
4. Add Slight Grain
Strangely, adding a small amount of grain can make an upscaled image look more natural.
Use:
Filter > Noise > Add Noise
Settings:
- Amount: 1–2%
- Distribution: Gaussian
It hides artificial smoothness.
Can I Upscale a Layer in Photoshop?
Yes, you can absolutely upscale a layer in Photoshop.
Instead of resizing the entire image, Photoshop allows you to scale individual layers.
Steps to Upscale a Layer
- Select the layer in the Layers Panel
- Press Ctrl + T (Windows) or Cmd + T (Mac)
- Drag the corner handles to enlarge the layer
- Hold Shift to maintain proportions
- Press Enter to apply
However, remember that scaling a raster layer too much can reduce quality.
A smarter approach is to:
Convert the layer to a Smart Object first
Then resize it.
It keeps the transformation flexible and prevents repeated quality loss.
Read also: Generative Fill in Photoshop
Best Photoshop Settings for Image Upscaling
To achieve the best results when practicing upscaling an image in Photoshop, use these recommended settings:
- Resample Method: Use Preserve Details 2.0, which keeps textures sharper and reduces blur when enlarging images.
- Noise Reduction: Set the value around 10–20%. It helps remove artifacts that sometimes appear after increasing the image size.
- Sharpen Amount: Apply a sharpening amount of 40–70% to restore details that may soften during upscaling.
- Sharpen Radius: Keep the radius between 0.5–1.2 px for natural-looking edges without creating halos.
- Upscale Step: Increase the image size gradually by 150–200% per step, rather than scaling too much in one go.
Common Mistakes When Upscaling Images
Many beginners run into issues because of these common mistakes.
Upscaling Too Much at Once
Increasing an image by 400–500% instantly often creates heavy blur.
Always upscale gradually.
Using the Wrong Resampling Method
Options such as Nearest Neighbor or Bilinear are outdated and yield poor results.
Stick with: Preserve Details 2.0
Forgetting to Sharpen
Upscaling almost always softens an image.
A little sharpening restores clarity.
Working With Low-Resolution Images
If the original image is extremely small (for example, 300px), even Photoshop can’t create perfect detail.
Starting with a higher resolution always produces better results.
Final Thoughts
Learning how to upscale an image in Photoshop can dramatically improve your editing workflow. Whether you’re fixing low-resolution photos, preparing images for printing, or creating larger visuals for marketing, Photoshop offers powerful tools to help.
The key is using the right technique:
- Use Image Size with Preserve Details 2.0.
- Upscale gradually instead of instantly.
- Apply light sharpening after resizing.
- Convert layers to Smart Objects before scaling.
With a little practice, you’ll be able to enlarge images without losing sharpness, clarity, or professionalism.
If you’re short on time to fix your photos, no worries! Contact us now to get free image editing services. Click here to contact our sales representative!
Image Source: